Showing posts with label DIY. Show all posts

DIY Floral Crown

Apr 11, 2014


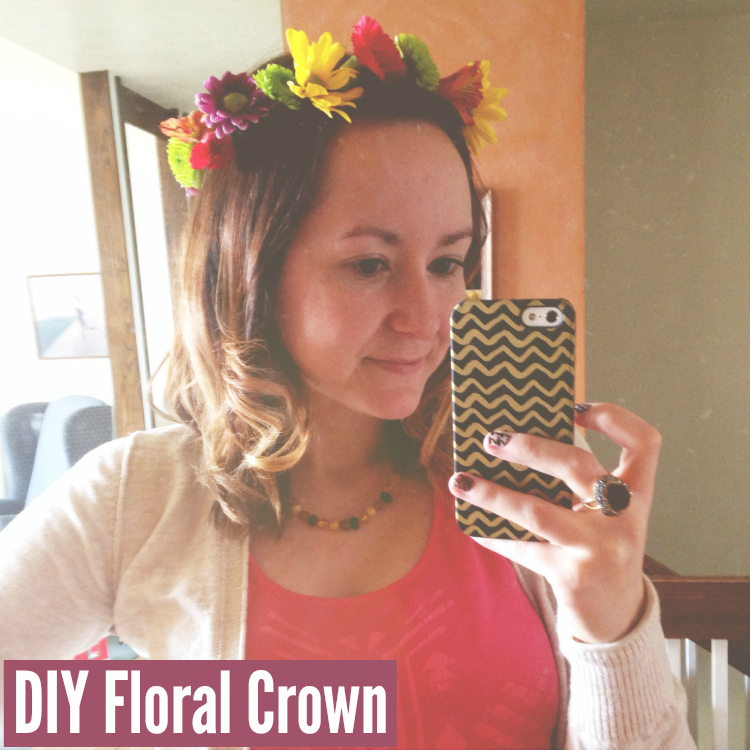
Remember this lovely little number from my Birthday Week? It's not really a secret that I'm obsessed with floral crowns (see here, here, and here for some examples) but up until now I've only made them with faux flowers. I like them to last a while! For my birthday I decided to make my first fresh floral crown but these are the steps you can take for a quick DIY with fresh flowers or faux. A lot of my faux ones become more complex/involved than this, but this is a good place to start if you're a beginner. This is what I do if I want to whip one up in five minutes! 


1. Take some green florist wire and cut it longer than you need. Measure it around your head for an accurate size and then wrap the ends so they stay put pretty well. I usually measure 5-6 inches longer than what I need for this.
2. Cut up your flowers! If you're using faux cut the pieces you want off the stem. Same goes for fresh.  You can leave the stems longer than you need and cut them down while you're working. Once you've done this a few times you'll get a good idea on that too! 
3. Take your green floral tape and start wrapping! Line up the wire and the flower stem and wrap them tightly with the tape so they're secure. You can put the flowers as close or far apart as you like. 
4. Admire your handy work and wear your beautiful crown out somewhere! Yes, you'll probably get looks (I know I always do) but you'll look great so who cares? Also, if you're making fresh floral crowns I recommend doing it only an hour or so before you plan to wear it. This one held up well but by the end of the night some of the flowers were starting to wilt. I was glad I made it right before I left the house. 


And that's it my bloggy friends. That's everything you need to know to make a beautiful floral crown! Of course you can always modify this in many ways. Yours can be fuller or more sparse depending on your preference. For the really big flowers I usually pull out my glue gun and some plain headbands. I've found they stay a lot easier that way. Enjoy! 

xo Sue

A Bug Invitation

Feb 5, 2014


I'm not sure how she became our "Ever-bug" but the nickname has stuck. Sometimes I try to not call her that but the minute I stop thinking about it I fall right back into the name. She's our baby bug! She's turning ONE so very soon so I made these invitations to her party. Photoshop is amazing, but I love PicMonkey for quick projects like this. They had these darling little bug stickers to make the perfect party invitation. Obviously I left out details but you get the idea, right? I'm so excited for Everly's very first birthday party! 

xo Sue

Custom Canvas Quotes

Dec 12, 2012

I've been nesting! My daughter's room is my favorite room in the house and it's not even done yet. It's been a little frustrating because everything I've wanted I've had to order online and the waiting on overseas shipping makes me crazy. I can find decor here but the big things (like furniture!) have been much more difficult. My favorite part of decorating her room has been my DIY projects. It makes me feel like I'm really creating this space for her. They've all been very simple but I've learned that things don't have to be extravagant or difficult to be beautiful. So far these custom canvas quotes have been my favorite project and after sharing them on Instagram I've had numerous requests for the tutorial. So by popular demand, I give you my insanely easy custom canvas quotes tutorial.

Materials needed
blank canvases
paint brush
mod podge (I used satin, a great mix between glossy and matte)
quality printed photos (I made mine on PicMonkey and ordered them from Shutterfly)

Start by painting the blank canvas with a thin coat of mod podge. Lay your photo on the canvas and flatten it out so there are no bubbles. Cover the entire photo with mod podge, going over the edges to make smooth lines. Let it dry completely. Hang your canvas photos anywhere you want and enjoy the beautiful finished product!


I used 5x7 canvases and photos because I didn't want them to take away from the rest of her room, just add a little something special, but you can use any size you like. Also, be sure your photos printed are a good quality. The first ones I had printed at a tiny local store in Japan were terrible. They bubbled and peeled and curled in on the edges. The prints from Shutterfly were perfect and gave me no trouble at all. I've also made something similar to this with photos printed on my own printer and they worked great as well. As long as you have quality photo paper this project will work well.
xo Sue

A Creative Keyboard

Jun 4, 2012

Did you ever notice how boring keyboards are? I've seen a few fun ones flying around the internet but I'll be honest- I love the simplicity of a small, wireless Apple keyboard. That doesn't mean I don't want a little creativity thrown in there. I also didn't want something permanent. My blog is proof of how often I like to change things up! The solution? Washi Tape. my.favorite.thing. And since I'm super cool really lucky, I live in Japan and can find it at any stationary story.
I was lucky enough to find lettered Washi Tape & I stuck with green & pink stripes as the alternates. I also didn't do the entire keyboard but I can always change that in the future.
And the best part? It doesn't leave sticky residue. When I get bored of this design I can peel it off. Or use my other Washi Tape to make a completely new design. The possibilities are endless. Like I said, my.favorite.thing.